How To Screen Record On PC

Capturing your screen while playing a game, showing someone a new piece of software, or even communicating with a team member at work can be done easily with the right program. Whether you are using a Windows or a Mac operating system, it is possible to record the screen on your Windows PC or Mac with both built-in and third-party solutions. Below, take a look at our favorite choices for how to screen record on pc For Windows PC or Mac.
Xbox Game Bar
If you currently own a computer that is running Windows 10, you’re in luck with the built-in Xbox Game Bar. The Xbox Game Bar is designed to allow gamers the ability to quickly capture in-game videos and screenshots with just the push of a button (or a click of the mouse). If you are interested in getting started with the Xbox Game Bar, you can open it using the following steps:
- Access your computer’s Settings
- Locate and select Gaming > Xbox Game Bar to load the Xbox Game Bar settings
- Choose to Enable the Xbox Game Bar with the available button presented in this section of the settings
From this section of the Xbox Game Bar settings, you can also access and update any settings that directly correlate with the Xbox Game Bar itself. For example, you can set specific keyboard shortcuts that work for you based on the games you prefer to play when it comes to recording videos or taking screenshots. Setting up customized keyboard shortcuts can help to save time and streamline the process of recording your screen while using any type of software or game.
For those who prefer to play computer games on their Windows computer using an Xbox controller, there is no problem. You can also access and manage your Xbox Game Bar settings using the controller itself. To access the Xbox Game Bar with the use of your Xbox controller, ensure that it is plugged in and working properly. Once you are ready to record, press the official Xbox controller to bring up the official Xbox Game Bar menu, which will overlay your current screen.
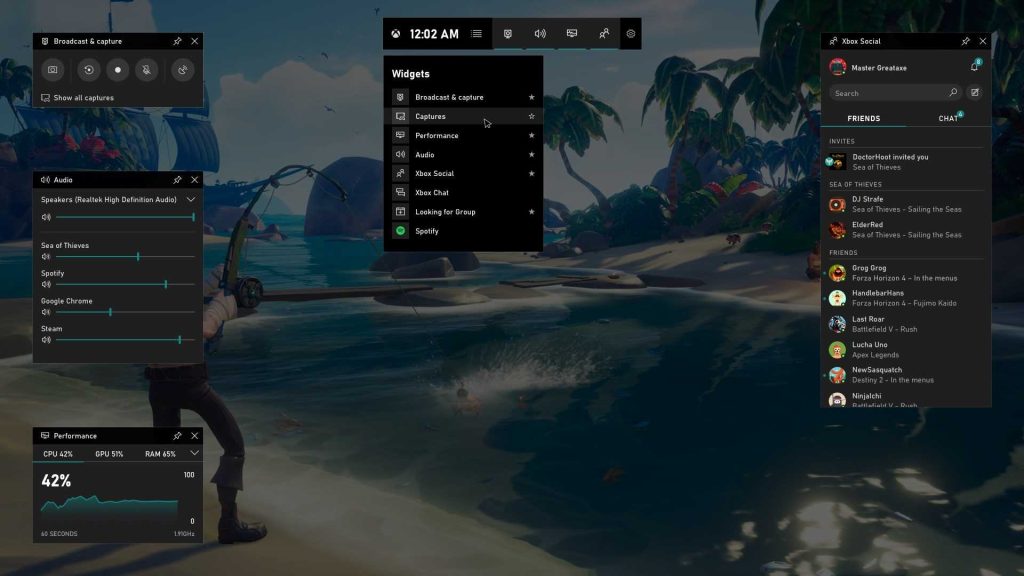
Capturing With the Xbox Game Bar
The basic settings in place for the Xbox Game Bar allow users to immediately get started with their screen recording projects. Once you are viewing the screen on the website or in the program or game you would like to record, simply press the Win (Windows) key + G on your keyboard simultaneously. Pressing Win + G simultaneously will bring up the Xbox Game Bar overlay menu, which will present you with the current controls available.
From this overlay, you can then choose the button which is labeled “Start Recording“, or you can choose to press Win + Alt + R simultaneously to begin the capture automatically. Once your recording begins, a smaller menu will appear, allowing you to stop the recording or track its overall time. To stop recording, simply press the Recording icon, which appears as a square while the recording is still active.
Pros of Xbox Game Bar
- Free: There is no cost to use the integrated Xbox Game Bar for those who are using a valid copy of Windows 10 on their current computer.
- Built-in: Using the Xbox Game Bar is easy to use and there is no need for additional downloads or installations in order to get started.
- User-friendly: Even if you are not familiar with the process of screen-recording, it is possible to do so with the use of the Xbox Game Bar. The Xbox Game Bar is accessible for professional editors as well as beginners who are just getting started with screen recording.
- Automatically saves recordings: With the Xbox Game Bar that is built-in, easily access your recorded screen captures by visiting the default C:\Users\[username]\Videos\Captures folder on your Windows 10 computer.
Cons of Xbox Game Bar
- Limited operating systems: Unfortunately, the Xbox Game Bar system is not available on any other operating system other than Windows 10 at this time.
- Lack of customization: While you can implement your own keyboard shortcuts, there is still a lack of customization with the Xbox Game Bar system in place.
Overall, for those who are looking for a fun and quick way to record their screen, the Xbox Game Bar is a solid choice. Free, fast, accessible, and easy to use, the Xbox Game Bar is useful for both personal and professional screen-recording projects.
OBS Studio
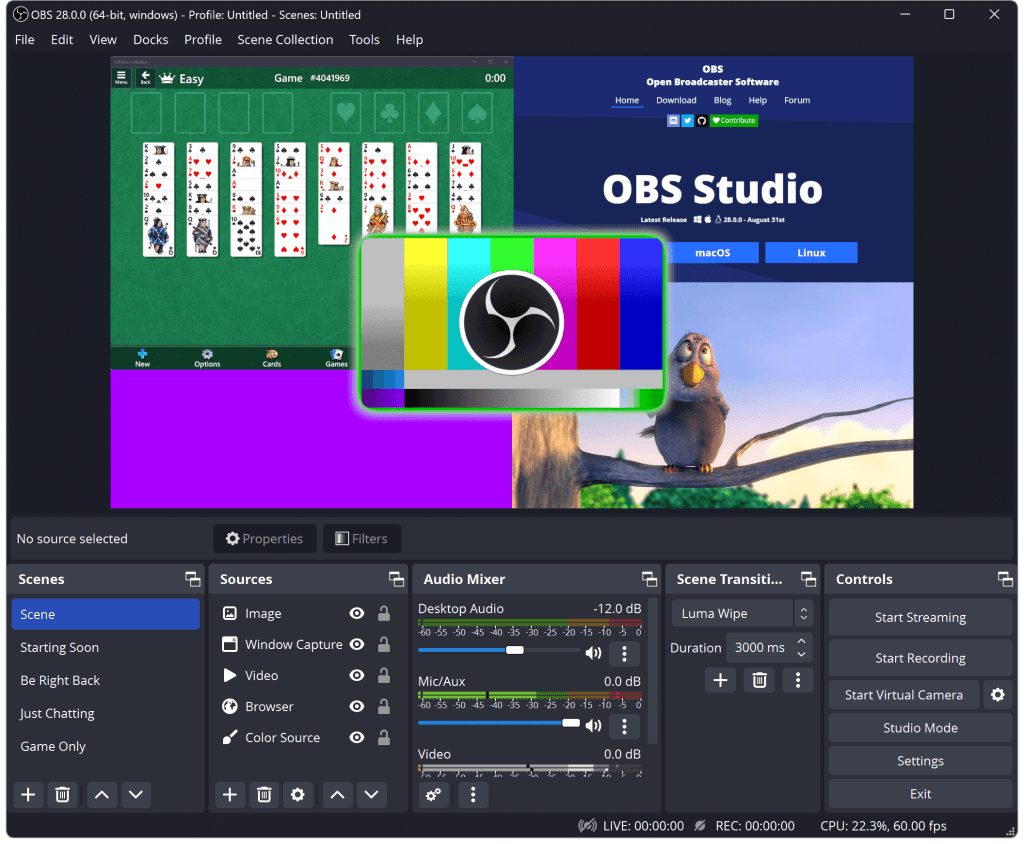
One of the very best and most versatile solutions when it comes to screen recording today is OBS Studio. OBS Studio is not only available for Windows users, but it is also available for those who are working on macOS and Linux computers as well. Although robust and complex with its features and abilities, OBS Studio is still highly accessible even to those who have little to no personal experience when it comes to recording and capturing their own screens.
OBS Studio can easily help users to record their screens, record voiceover, and even capture audio from various websites or programs they are using. Once you have the screen recording you need, you can easily save and export the file as a standard MP4 file, which is globally accepted and accessible.
Using OBS Studio is highly advisable for anyone who wants to take their screen capturing, editing, and exporting seriously. Not only is there a simple way to capture your screen with the use of OBS Studio, but it is also possible to edit, add transitions, make cuts, and change settings all from within the OBS Studio itself.
Pros of OBS Studio
OBS Studio is one of the most versatile programs for those who are working on various operating systems.
- Versatility: Fortunately, OBS Studio is currently available for Windows, Linux, and macOS users, making it one of the most versatile options on this list.
- Functions and features: If you are seeking a screen capturing program that provides plenty of functions and features, OBS Studio delivers. OBS Studio not only provides basic screen capturing, but also editing, transitions, and advanced exporting options.
- Cost: OBS Studio is completely free of charge. Yes, the entire full version of OBS Studio across all operating systems is free of charge.
Cons of OBS Studio
While OBS has plenty of features and functions, it is not always the first choice for those who are new to using a screen recording tool or piece of software.
- Intimidating UI: When you first glance at the user interface of OBS Studio, you are likely to feel intimidated if you are unfamiliar with screen capturing software and recording tools. While at first glance it may appear intimidating, it is extremely easy to adjust to, even for those who consider themselves to be beginners.
- Confusing: If you are looking for software for screen recording that is basic and simplistic in nature, you may be better off searching for an alternative solution. Using OBS Studio is highly recommended for professional gamers, broadcasters, and video editors. For those working on smaller or personal projects, an alternative built-in tool or solution may be best, especially one without so many features as OBS Studio.
Free Cam
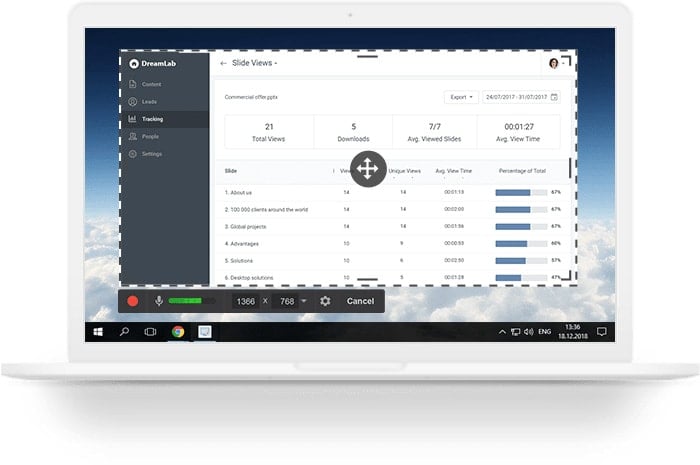
Free Cam is one of the most basic, yet modern screen recording programs available for Windows users today. If you are seeking a piece of software that is simplistic in its user interface and its ability to generate screen captures, Free Cam may just be the right choice for you. Free Cam is currently available entirely free to download, but it is also available with a PRO Version, which costs $227 USD annually.
With Free Cam, not only is it possible to record traditional screen captures, but it is also possible to select a specific recording area and use your mouse to highlight various sections that should be focused on. Additionally, Free Cam also allows users to record system sounds while also providing the ability to record your own voiceover for your screen recording projects.
Pros of Free Cam
- Price: Free Cam is available free of charge. Although there is a PRO version of Free Cam available, the free version is entirely suitable for those just getting started with screen capture.
- Easily accessible: The user interface of Free Cam is simple and straightforward, making it easy for just about anyone to use.
- Integrating sharing functions: Easily export your screen captures as WMV files or share them to your own YouTube page with the use of Free Cam.
Cons of Free Cam
- Basic interface: Unfortunately, Free Cam, while entirely adequate for those who require basic screen recording, is limited in its features. Free Cam is extremely basic for those who are in search of extensive editing tools and technologies.
- Premium features unavailable for free: If you are interested in additional features such as higher quality exports, multi-track timelines, and the ability to insert your own music, text, and pictures, you will need to purchase the PRO Free Cam software.

macOS Screenshot Tool
If you are not using a Windows computer but you are looking for a way to record your screen on a Mac computer, you can do so with the macOS Screenshot Tool. The macOS Screenshot Tool is a free and built-in feature that is available to those who are working on Mac computers using macOS Mojave and higher (currently). Getting started with the macOS Screenshot Tool does not require any additional installations or software in order to launch the program.
To open the macOS Screenshot Tool, simply navigate to the program or website you would like to record and simultaneously press the Shift + Command + 5 keys. Pressing Shift + Command + 5 will open your macOS system’s built-in screen-recording tool. Once this toolbar appears on your screen, you can choose just how much you would like to capture once the tool begins recording.
With the macOS Screenshot Tool, you can choose to record a select portion of your screen, a chosen window that you currently have open, or you can opt to record your entire screen at all times. For users who are looking for a way to set a timer before the screen capturing begins, you are in luck with the macOS Screenshot Tool.
The macOS Screenshot Tool includes a built-in timer setting that can be accessed by clicking on the Options button of the macOS Screenshot Tool toolbar. This menu will present you with Timer options, which include ‘None’, ‘5 Seconds’, and ’10 Seconds’. This is ideal for those who do not wish to edit or clip their recordings any more than necessary.
For Mac QuickTime Users
For Mac users who prefer to use QuickTime on their Mac computers, it is also possible to begin capturing your screen with the use of QuickTime, which is also built-in to all macOS computers. To begin recording your screen with the use of QuickTime, launch the app and complete the following steps:
- Select File
- Choose New Screen Recording
- Follow the on-screen prompts to grant system permission to QuickTime to record and capture your screen on-demand.
- Re-launch QuickTime and select File > New Screen Recording to begin recording and/or capturing your screen.
Using a screen-recording tool or program can help you to easily capture your screen for recreational or professional purposes. Whether you’re collaborating with an entire team of co-workers or if you are playing in a gaming tournament, using the right screen-capturing solution can make all of the difference.